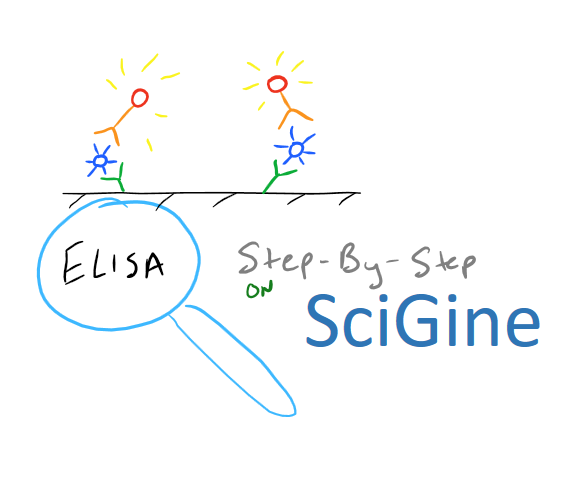
ELISA: A Step By Step Method Guide
ELISA Biological Method Overview
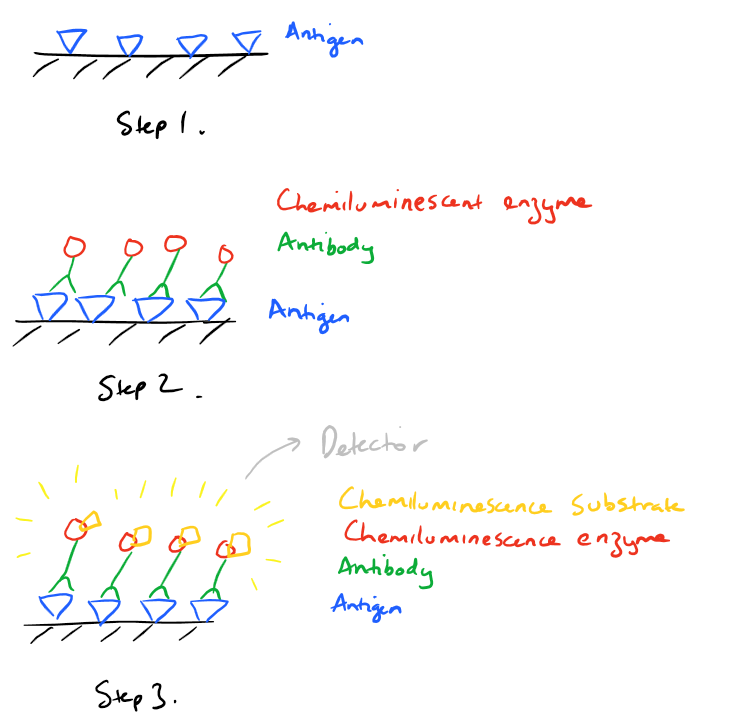
ELISA is the common acronym for Enzyme-Linked-Immunosorbent Assay. It’s a quick plate based technique for detecting an antigen from a solution. This antigen could be a peptide, protein, antibody, or small molecule. In general, for an ELISA, an antigen is first immobilized on a surface (Step 1 below). Next, an antibody specific to the antigen is flowed over the surface (Step 2). This antibody, is also attached to a chemiluminescence-related enzyme. Treatment with the chemiluminescent substrate facilitates detection of the antibody and the antigen (Step 3). Take a look at these pictures to get an overview of the strategy:
Conjugated proteins may require different antibodies in ELISAs. However you can easily track the ELISA process by labeling your protein with a fluorescent probe.
Types of ELISAs
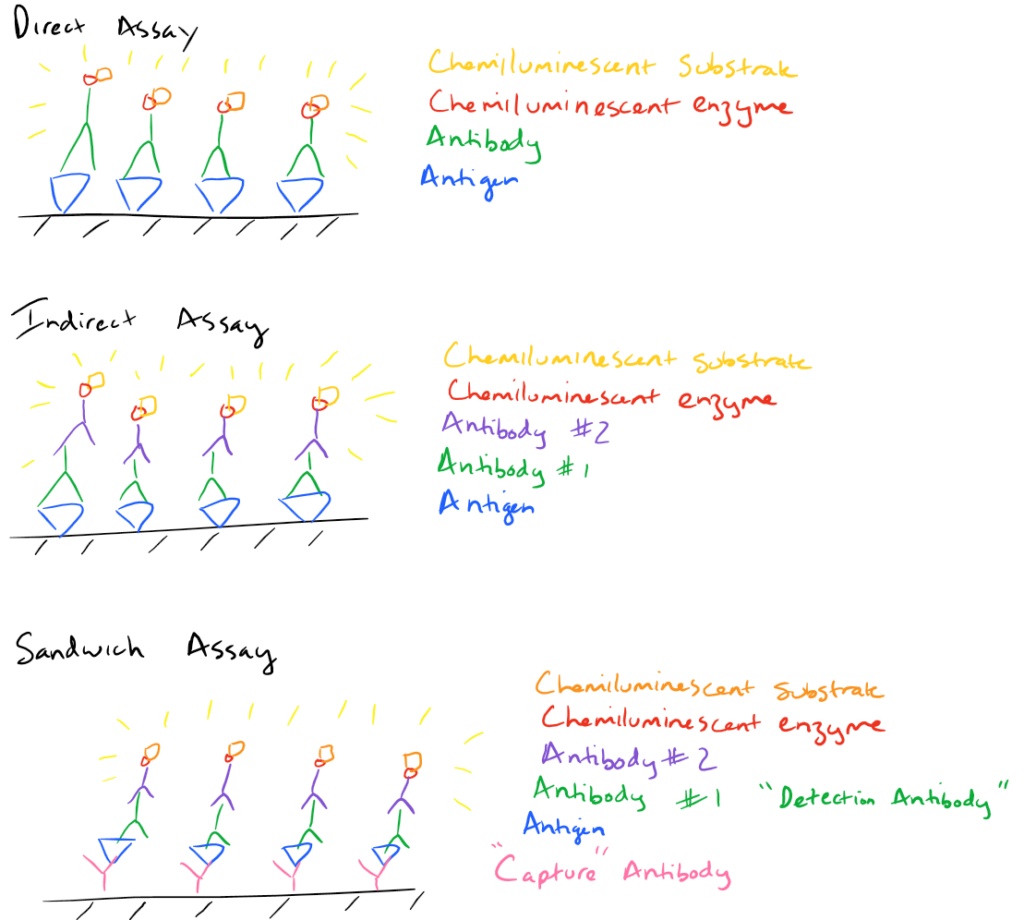
There are a few different types of ELISA assays but they all follow the basic strategy outlined above. Essentially, one can choose how to immobilize the antigen on the surface and how the antigen is detected via the antibody.
- Direct Assay: In this method, the antigen is immobilized to the surface and detected directly via an antibody that’s bound to a chemiluminescent enzyme. (Same as above)
- Indirect Assay: In this method, the detecting antibody doesn’t have the chemiluminescent enzyme. So, another antibody must bind to the first antibody to facilitate detection.
- Sandwich Assay: The most common type of ELISA. In this assay, a “capture” antibody is first immobilized to the substrate. Then antigen is flowed over it so that it gets immobilized to the surface along with the capture antibody. Finally the detection antibody is flowed over the substrate and it binds the antigen. This detection antibody may be directly conjugated to the chemiluminescent enzyme (just like a direct assay) or another antibody may be needed (just like the indirect assay).
Related articles:
- You can also simply attach your target proteins to gold to visualize them. Here are some methods to bioconjugation proteins and antibodies to gold.
A Complete Sandwich ELISA protocol
Materials for ELISA
|
96 well polystyrene plate |
|
|
Plate shaker |
|
|
Pipettes |
|
|
Coating buffer |
0.2 M sodium carbonate/bicarbonate buffer, pH 9.4 |
|
Wash buffer |
0.1 M phosphate, 0.15 M sodium chloride, pH 7.2 with 0.05% Tween 20 |
|
Blocking buffer |
2% w/v Bovine Serum Albumin in Wash Buffer |
|
Diluent buffer |
2% w/v BSA in Wash buffer or a more appropriate buffer such as cell culture media |
|
Stop buffer |
2 M Sulfuric Acid |
|
Capture Antibody Solution |
15 ug/ml antibody in coating buffer |
|
Detection Antibody Solution |
10 ug/ml in (20% Diluent buffer/80% Wash Buffer) |
|
Enzyme Conjugated Antibody Solution |
200 ng/ml in (20% Diluent buffer/80% Wash Buffer) |
|
HRP Substrate |
TMB (3,3′,5,5′-tetramethylbenzidine). 1 mg/ml. Usually commercially available as a solution. |
Step-By-Step Method for ELISA
- Prepare a standard curve with your antigen in Diluent Buffer spanning a wide range of concentrations from 0 pg/ml to 3 times your maximum expected antigen concentration (3000 pg/ml approximately)
- Dilute the capture antibody to 15 ug/ml and have enough for 100 ul/well
- Add the capture antibody to the polystyrene plate, cover, and incubate at room temp. for 2 hours
- Remove the solution from each well and add in wash buffer (200 ul per well). Shake for 5 minutes. Repeat 3-5 times.
- Add 200 ul of blocking buffer per well, cover and incubate at room temperature for 1 hour (or overnight at 4 oC).
- Prepare the samples and standards such that you have 100 ul per well
- Remove the wash buffer and add in your sample + standard antigens into different wells. Cover and incubate at room temperature for 1 hour
- Repeat Step 4 to wash the plate
- Add 100 ul of the Detection Antibody per well. Incubate at room temperature for 1 hour.
- Repeat Step 4 to wash the plate
- Add 100 ul of the Enzyme conjugated Antibody to each well and incubate for 1 hour at r.t.
- Repeat Step 4 to wash the plate (2 times). We need to make sure the plate is very clean and any non-specific binding is minimized.
- Add 100 ul of the HRP substrate solution (1 mg/ml TMB)
- Incubate until blue (usually about 10 minutes at room temperature)
- Add 100 ul of Stop Buffer. This should make the solution yellow.
- Measure using a plate reader at 450 nm absorbance.
Notes on this ELISA method
-
- Note 1. Your standard curve needs to span beyond your antigen concentration because you need to determine the exact amount of your antigen within the linear range of the standard curve. If necessary, dilute your antigen solution down to a point where it is within your standard range.
-
- Note 2. Concentration of antibodies used will need to be optimized. It is highly likely that you will need to dilute each of the antibodies down rather than increase their concentration because these are at the upper ranges of the necessary concentration.