
Protein labeling is an extremely useful process in many fields including biology, biotechnology, medicine, forensics, genetics, and more. In simple terms, protein labeling is the use of a ‘label’ to bind to a protein in one way or another so that it can be detected, monitored, analyzed, and even purified. Being able to label a target protein opens scientists up to a range of possibilities for interacting with a target protein and understanding the many complex processes that proteins perform in the body. While there are many different types of protein label and labeling techniques, this article focuses on protein labeling with fluorescent probes.
Protein labeling with fluorescent probes can be accomplished by linking cyanine dyes, rhodamine dyes, or fluorescein to cysteines, lysines, tyrosines, or the N-terminus of your target protein.
Related articles:
- You might enjoy our article on bioconjugation to surfaces since you study fluorophore bioconjugates
What Are Fluorescent Probes?
Fluorescent probes are molecules that absorb light at a specific wavelength and emit it at a specific wavelength that can be detected. Fluorescent probes are also known as fluorescent tags or fluorescent labels.
Take a look at this page from Nature about fluorescent probes. The absorbance and fluorescence of a fluorescent probe are dependent on a range of factors including its chemical structure, the solvent it is dissolved in, its binding target, and more. Fluorescent probes are mainly used in biological studies, but can also be used in other applications. This includes tracers, dyes and stains, indicators, and more.
In protein labeling, fluorescent probes are typically a reactive derivative of a fluorescent molecule known as a fluorophore. Each specific fluorophore is chosen so that it will selectively bind to the target protein in the desired location. In some uses of fluorescent probes, the fluorophore isn’t always chemically bound to the protein and instead binds by other mechanisms. For example, some fluorophores are adsorbed into the protein binding sites and can be used to learn more about the binding site structure and its affinities. Here’s a great chapter from Methods in Cell Biology that explores protein labeling with fluorescent probes in more detail.
What Types of Fluorescent Probes Are There for Protein Labeling?
Since there is so much diversity in proteins, it of course makes sense that there is a huge range of fluorescent probes available to choose from. Organic fluorescent dyes are the most common way of labeling proteins. They are excellent choices for protein labeling because they can be fine-tuned by changing their structure to make them more target-specific or to adjust their fluorescence.
Types of fluorescent probes for protein labeling include cyanines, rhodamines, fluorescein, biological proteins like GFP, and quantum dots.
Cyanine-Based Fluorescent Probes for Protein Labeling
These synthetic dyes contain conjugated polymethine chains with quaternary nitrogens as part of the system. Their fluorescent properties are easy to adjust depending on the functional groups and length of the conjugated chain. They often yield brighter and more stable fluorescence than alternative organic dyes. Here’s a great overview of cyanine dyes from Science Direct.
Related articles:
- You should also consider protein and antibody bioconjugation to gold to visualize proteins and antibodies under TEM
Rhodamine-Based Fluorophores
This family of dyes is mainly used for dying paper and as inks, but they also make excellent protein labels. They are high-performance dyes that are excellent for labeling antibodies in particular.
Fluorescein Labels for Proteins
The grandfather of organic fluorescent dyes for protein labeling. Fluorescein is one of the most important and successful fluorescent dyes. It is even listed as one of the WHO’s essential medicines. There are countless fluorescein derivatives in a huge range of applications so they remain the kings of protein labeling.
Biological Fluorophores
These fluorophores are formed from biological structures that can fluoresce. While they are often more expensive and time-consuming to use, they can be bound to proteins very effectively in specific cases and introduced into living cells, bacteria, or even entire organisms. Biological fluorophores have the advantage of being less likely to result in issues of toxicity by negatively affecting the proteins they are bound to. They can be made from other proteins, enzymes, antibodies, or other common biological structures that can be bound to a protein.
Quantum Dots
These relatively new fluorophores are significantly brighter and more stable than organic fluorescent dyes. They are tiny (nanometer scale) crystals made from semiconductors. Their fluorescence is linked to their size and shape, and they are exceptionally stable (one study reported quantum dots fluorescing for 4 months in vivo!). However, they are still novel technology and need more research. The main challenge with quantum dots is their toxicity. Since they are made from heavy metals and have high stability, they are potentially very toxic depending on a range of parameters such as their size, shape, composition, and more. They are powerful tools for protein labeling as they can be coated in different ways to optimize their binding.

Tips to Select A Fluorescent Probe for Protein Labeling
Proteins are large, complicated biological structures with potentially thousands of relevant functional groups and binding sites, as well as a specific 3D structure. This means that choosing the right fluorescent probe for your target protein is essential. However, there isn’t always literature on every protein and fluorophore, so you’ll have to do some experimentation to make sure you get the right fluorescent probe for the job.
To select a fluorescent probe for protein labeling, choose a fluorescent probe that’s specific to your protein, in a detectable wavelength, stable in your experimental conditions, and doesn’t interfere with other fluorophores or components in your experiment.
1. Determine What Protein You Want to Label
This seems obvious but it’s the most important factor. You need to know exactly what you’re looking for, or there isn’t much point trying to label a protein. Are you targeting a specific family or protein? Or one particular protein? The more you know about your target, the easier it will be to choose a fluorescent probe. You’ll also need to analyze how to purify your recombinant protein with your fluorescent label.
2. Determine if Experimental Conditions Will Quench or Interfere With a Fluorophore
What are you trying to do once you’ve labeled your target protein? Monitoring intracellular protein processes in real-time might require a very stable fluorescent probe that has low toxicity. What if you’re trying to purify your target protein? That might open your options to include fluorescent probes that aren’t as long-lived but are brighter and will give you more precision.
3. Choose a Fluorophore That Binds Specifically to Your Target Protein
Your fluorophore needs to be specific in binding to your target protein. It’s no use to you if your label binds to various proteins that you aren’t interested in and gives you false readings. Worse yet, a poorly chosen fluorophore might bind to multiple proteins at once. We’ve discussed protein conjugation chemistry in detail in another article.
4. Find a Fluorophore That Can Be Detected Easily
Great, you’ve added your fluorescent probe to your protein, but can you see it? Your fluorescent probe needs to be bright and easy to detect in your sample. If your sample matrix affects the fluorescent of your probe, you’re not going to get an accurate measurement. It’s especially important that it doesn’t fluoresce at the same wavelength as any component of your sample of you’re going to get a false reading.
5. Ensure That Your Fluorophore Is Stable in Your Experimental Conditions
Your fluorescent label of choice needs to be stable in your sample and when bound to your target protein. It will need to remain stable long enough for you to complete your experiment, but without it affecting the biological system you’re monitoring.
6. Minimize Interference Between Your Fluorophore and Other Fluorophores or Experiment Components
In many cases, your fluorescent probe needs to not interfere with the function of the protein, or the function of the biological system you’re monitoring the protein in. There’s no point labeling a protein if its function is completely impaired by the binding of your label. Worse yet, you won’t be able to monitor proteins in cells or other living organisms if your probe is so toxic that it kills them. When working with living samples, make sure to select a probe with suitable toxicity for the duration of your experiment.
Techniques to Analyze Proteins Labeled With Fluorescent Probes
Once you’ve labeled your protein with a fluorescent probe, there’s an amazing range of potential uses for your labeled protein. Proteins can be observed, quantified, and studied in great detail once you’ve attached a label.
To analyze your protein labeled with a fluorescent probe, you can use techniques such as fluorescent microscopy to quantify and monitor your target protein, flow cytometry to sort proteins, and even monitor living cells using fluorescent live-cell imaging with multiple labeled proteins.
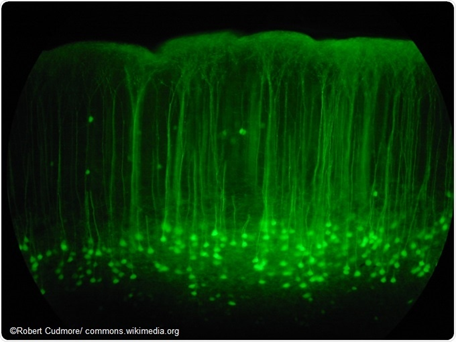
Analyzing Proteins Labeled With Fluorescent Probes Using Fluorescence Microscopy
Labeled proteins can be identified in cells and cellular components with exceptional specificity. Many uses extend from this. For example, the levels of proteins expressed in certain tissue can be quantified to understand the effects of a specific gene. Another example is the use of multiple fluorescent probes to monitor a protein and the components it interacts with to provide more detail about the mechanisms occurring within a cell. In medical diagnostics, cancer-specific proteins can be labeled to learn more about specific cancers. We’ve written about immunofluorescence microscopy in detail and discussed how to use antibodies attached to fluorescent probes.
Flow Cytometry Can Sort Proteins Labeled With Fluorophores
Labeled proteins can be sorted and quantified in real-time as they pass through a light beam of detectors that measure their fluorescence. In medicine, this technique can be used to rapidly screen for medically relevant proteins. This technique is used in immunology (for example, antibodies), hematology (blood proteins and other markers), oncology (cancer-specific proteins as mentioned above), and even genetics (measuring gene expression by protein markers). Flow cytometry is a popular technique because it is relatively cheap and reliable. We’ve discussed the flow cytometry method and theory behind this technique here.
Live-Cell Imaging Can Be Used to Visualize Proteins Labeled With Fluorescent Probes in Biological Systems
Labeled proteins are extremely useful in monitoring intracellular processes in real-time using time-lapse fluorescence microscopy. It provides insights into the life of a cell and the active processes within. As mentioned above, the use of multiple fluorescence probes can provide intricate details to the internal structure of a cell. However, a careful balance needs to be found between collecting enough data without producing phototoxic effects from overusing the fluorescent probes.
Related articles:
- Fluorescent western blotting is a simple and effective technique for analyzing labeled proteins
Where Can I Buy Fluorescent Probes?
Most major chemical suppliers sell specific fluorophores. Organic fluorescent dyes are the most commonly available types but now more unusual types like quantum dots are becoming available. Many suppliers produce protein labeling kits that contain everything needed to complete the process in a short time. Some offer the ability to label up to 10 mg of protein.
Fluorescent probes can be bought from most life science suppliers such as Anaspec, ThermoFisher, and LiCor.
Here are some examples of protein labeling kits found on the market:
AnaTag 5 microscale protein labeling kits. These labeling kits use fluorescein isothiocyanate (FITC) as a fluorophore. The kit is suitable for biological applications and can label 3 x 200 ug of protein.
Alexa Fluor protein labeling kits from ThermoFisher. These kits offer a very straightforward way to covalently label 1 – 10 mg of protein with a fluorescent dye. They offer a range of dyes with a broad range of excitation and emission wavelengths.
LI-COR IR Dye protein labeling kits. These kits are designed for labeling antibodies for use in flow cytometry where fluorophore-conjugated antibodies are required.
Step-by-step Example of Labeling a Protein With a Fluorescent Probe
The most straightforward way to label a protein with a fluorescent probe is to use a protein labeling kit like those mentioned above. Most of these processes use a similar process to label the proteins. Below you’ll find the general steps that protein labeling kits like this one. They are very easy to use and require a small time investment.
You may also like our article on methionine selective bioconjugation to attach fluorophores at methionine residues.
Materials Needed for Protein Labeling
· Protein labeling kit
· A suitable amount of purified protein
· 30 minutes of hands-on time
· 2 hours until the protein is ready
General Steps to Label With Fluorescent Probes
Step 1. Add Your Protein Into a Vial With the Fluorophore and a Magnetic Stir Bar
Most kits come with a premeasured quantity of dye and vial for you to perform this step.
Step 2. Let the Reaction Occur With Gentle Stirring
The kit will tell you how long you need to stir the reaction. Be careful not to stir too aggressively as some proteins are sensitive to agitation.
Step 3. Purify the Protein Using the Size Exclusion Column Provided
These are usually gravity-fed size exclusion columns that purify out your protein.
Step 4. Collect Your Purified Labeled Protein
Collect your protein from the column. Now you can perform your experiments on the protein.
As you can see, the process is fairly simple and requires minimal effort as all of the equipment you need to label the protein is provided in the kit.